jueves, 27 de febrero de 2014

SQL Server - Linked Server

How to import an Excel file using Linked Server

1.- Download the Microsoft Access Database Engine 

http://www.microsoft.com/en-us/download/details.aspx?id=13255

In my case I installed the x64 version, to avoid problems I did through the console.

  • Open a cmd console as Administrator
  • Change the path where is your AccessDatabaseEngine_x64.exe file
  • Execute the file adding at the end /passive, example: 
C:\Users\ERODVEL\Documents>AccessDatabaseEngine_x64.exe  /passive
2.- Open your SQL Server Management Studio

  • Review that the Provider has been installed
  • Select Microsoft.ACE.OLEDB.12.0 and right click in Properties, and review that the only selected option is "Allow inprocess".


  • Other form is by code    
EXEC sp_MSset_oledb_prop N'Microsoft.ACE.OLEDB.12.0', N'AllowInProcess', 1
GO


  • Add a new Linked Server using the following code
EXEC master.dbo.sp_addlinkedserver
    @server = 'ExcelServer2',
    @srvproduct=N'ACE 12.0',
    @provider = 'Microsoft.ACE.OLEDB.12.0',
    @datasrc = 'C:\Users\YOUR_USER\Documents\YOUR_EXCEL_FILE.xls',
    @provstr = 'Excel 12.0;HDR=YES;'


  • In the properties, configure the Security 
If not the error will be:
Cannot initialize the data source object of OLE DB provider "Microsoft.ACE.OLEDB.12.0" for linked server 

Queries

To do a query
  • Reference the table as [Linked_Server_Name]...[Tab_name$]

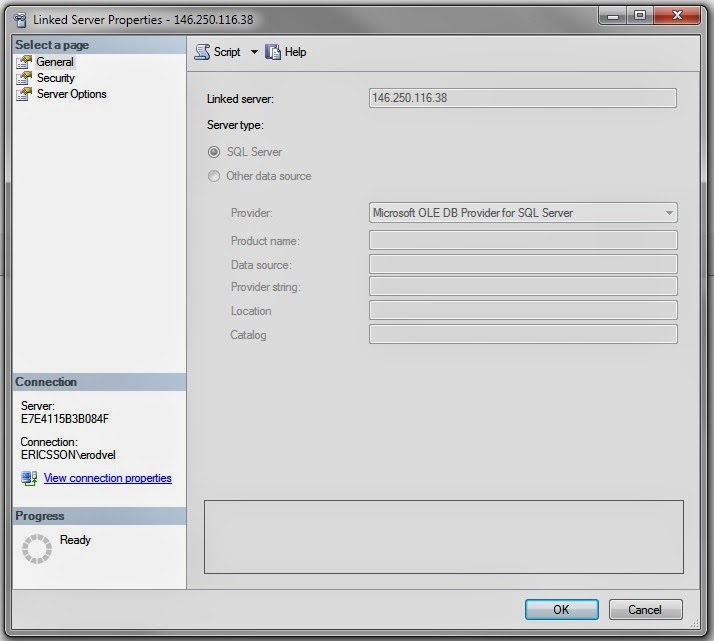
Linked Server to another Sql Server Instance

  1. Create a New Linked Server
  2. In the General section
    • Type in Linked Server the name or IP of the sql server to connect
    • In Server Type: Select SQL Server,
  3. In the  Security Tab, select "Be made using this security context" 
  4. Type OK

Using XLSM

When create the Linked Server in the Provider String property @provstr  change to Excel 12.0 Macro, where Macro is the key

EXEC master.dbo.sp_addlinkedserver
    @server = 'ExcelServer2',
    @srvproduct=N'ACE 12.0',
    @provider = 'Microsoft.ACE.OLEDB.12.0',
    @datasrc = 'C:\Users\YOUR_USER\Documents\YOUR_EXCEL_FILE.xls',
    @provstr = 'Excel 12.0 Macro;HDR=YES;' 


Security

To configure the security add  to the script
 
 EXEC master.dbo.sp_addlinkedsrvlogin @rmtsrvname=N'Test',@useself=N'False',@locallogin=NULL,@rmtuser=NULL,@rmtpassword=NULL

Update 

    UPDATE DATA
    SET [Result] = @result
    FROM OPENROWSET('Microsoft.ACE.OLEDB.12.0',
    'Excel 12.0 Macro;HDR=Yes;DATABASE=C:\\SRC\Period.xlsx',
    'SELECT [Result] FROM [Period$] WHERE [Result] IS NULL') AS DATA

References

http://akawn.com/blog/2012/01/query-and-update-an-excel-2010-spread-sheet-via-a-linked-server/


http://vogtland.ws/markedwardvogt/?p=991

http://www.excel-sql-server.com/excel-import-to-sql-server-using-linked-servers.htm


SQL Server - Tips

List All Tables of Database


USE [YourDBName]
GO 

SELECT 
*FROM sys.Tables
GO


Insert structure from one table to another


SELECT *
into new_table
FROM origin_table where 1 =2 

How to create a counter

Use the function ROW_NUMBER ( ), where the syntaxis is
 
ROW_NUMBER ( ) OVER ( FIELD order_by_clause )
 
Where FIELD  is the name of the column you want to use to start counting. Example:

SELECT ROW_NUMBER() OVER(ORDER BY SalesYTD DESC) AS Row, 
FROM Sales.vSalesPerson
 

Enumerate rows ... 1.2.3....

 
ROW_NUMBER() over ( ORDER BY [Job Stage]) as [pyramidPosition]
 

Reset the enumeration  ..... 1.2.3....1.2.3


ROW_NUMBER() over (partition BY idProject ORDER BY [Job Stage]) as [pyramidPosition]
 
http://sqlfiddle.com/#!6/501c0/2/0
 
 Update Table from Select
 

Update projects

set projects.tg4Real = [TG4 Date Real DD/MM/YYYY] ,
 projects.tg5Real = [TG5 Date Real DD/MM/YYYY] 
from
 projects p
inner join
 gtt...[Upload$] u
on p.projectName = [Project Name]


Multi user

ALTER DATABASE DATA_BASE SET MULTI_USER; 
 

Add user to a DB

Can you check it by Going To Security --> Login-->Right and Click Property and then goto user mapping tab. Then select the database


Convert String Dates to Date/Datetime 

From '12/10/25' to date 
CONVERT(DATE,CAST ( RTRIM( LTRIM([CREATION DATE])) as nvarchar), 103) 

From '16/01/2007 3:03:35:270AM' to datetime
From '23/06/2014 09:07:17 a. m.'  to datetime
CONVERT(datetime, ( RIGHT(LEFT([START TIME],5),2) + '/'+LEFT([START TIME],2)+'/'+ RIGHT(LEFT([START TIME],10),4)+  SUBSTRING([START TIME],11, 9 ) + REPLACE( SUBSTRING([START TIME],21, 4 ), '. ', '' ) ) , 120 ) as ODBC_datetime


Android - First Steps VI


Arrays

In your project in the following path: res -> layout folder, create an Android XML file. 
Select from the wizard in Resource Type : Values and named the Xml file as "javafacts.xml".


The XML file must have the following structure:

<?xml version="1.0" encoding="utf-8"?>
<resources>
    <string-array name="messages">
        <item>
First element</item>
        <item>Second element</item>
    </string-array>
</resources>


Get Array in code

In this case R.array.messages is by the name in defined in the XML file.
Resources resources = this.getResources();
        String[] javafacts =  resources.getStringArray(R.array.messages);


miércoles, 26 de febrero de 2014

Android - First Steps V

Preferences

Create XML file

  1. Create am Android Xml File 
  2. In Resource Type, select Preference
  3. In Root Element, select PreferenceScreen

Create a class

  1. Create a class that extends from PreferenceActivity.
  2. Override the method onCreate.
  3. Load Preference file
    • Use the method addPreferencesFromResource(R.xml.name_file);. //This method is deprecated in Android version after HoneyComb (Build.VERSION_CODES.HONEYCOMB).
      To knkow the version use: Build.VERSION.SDK_INT
    •  For later version after Honeycomb you need to use a FragmentTransaction and Fragment object, where Fragment receive an inner class that extends from PreferenceFragment.
if (savedInstanceState == null) {
            FragmentTransaction transaction = getFragmentManager()
                    .beginTransaction();
            Fragment fragment = new MyPreferencesFragment();
            transaction.replace(android.R.id.content, fragment);
            transaction.commit();
        } 


@TargetApi(Build.VERSION_CODES.HONEYCOMB)
    public static class MyPreferencesFragment extends PreferenceFragment {
        @Override
        public void onAttach(Activity activity) {
            super.onAttach(activity);
            Log.d("F", "I'm attached to an activity - I have a context!");
        }

        @Override
        public View onCreateView(LayoutInflater inflater, ViewGroup container,
                Bundle savedInstanceState) {
            this.addPreferencesFromResource(R.xml.penguin_prefs);
            return super.onCreateView(inflater, container, savedInstanceState);
        }
    }; 

  1. asda


lunes, 24 de febrero de 2014

Android - First Step IV

Tips

Best Image configuration

The best quality for image is Bitmap.Config.ARGB_8888

Create a message in the view

Toast.makeText(getApplicationContext(), path.toString(),
                Toast.LENGTH_LONG).show(); 

Permission to storage files

<uses-permission android:name="android.permission.WRITE_EXTERNAL_STORAGE"/> 

Get external directories

        File path = Environment
                .getExternalStoragePublicDirectory(Environment.DIRECTORY_PICTURES); 

Count the time

        SystemClock.uptimeMillis()

Make a pause

        postInvalidateDelayed(time_ms);

 Resources for all screen devices

Create a folder inside res folder and then a folder called  drawable-nodpi.  All the resources inside this folder will used without consider the device resolution screen.

Redraw the View

The method postInvalidateDelayed(int ms) notifies the system from a non-UIThread and the View gets redrawn in the next eventloop on the UIThread as soon as possible.

postInvalidateDelayed(40);


Views

How create an ImageView 

        Bitmap bitmap = Bitmap.createBitmap(8, 8, Bitmap.Config.ARGB_8888);
        Canvas c = new Canvas(bitmap);
        c.drawColor(0xff808080);
       
        Paint paint = new Paint();
        paint.setColor(0x800000ff);
        c.drawLine(0, 0, 3, 3, paint);

       
        ImageView v = new ImageView(this);
        v.setImageBitmap(bitmap);
        setContentView(v);

How create a View

Every time the view is draw always call the method OnDraw().

     //Same code as above

 View v = new View(this){
            @Override
            protected void onDraw(Canvas canvas) {
              
                canvas.drawColor(0xff808080);
                canvas.drawBitmap(bitmap, 10, 10, null);
                canvas.scale(arg0, arg1)
                super.onDraw(canvas);
            }
          
        };

How enable the menu option

Override the method onOptionsItemSelected and use the following code inside the if sentence.
@Override
public boolean onOptionsItemSelected(MenuItem item) {
// TODO Auto-generated method stub
int id = item.getItemId();
        if(id == R.id.action_settings) {
            Intent i = new Intent(this,MenuActivity.class);
            startActivity(i);
            return true;
        }
return super.onOptionsItemSelected(item);
}


viernes, 21 de febrero de 2014

Android - First Step III

Get Preferences

The method help to store information we want to store even after our app has stopped, and return a SharedPreferences object.

SharedPreferences pref = getPreferences(MODE_PRIVATE);

The parameter MODE_PRIVATE means that only our app can access to the store information.


GET/SET values

Use the methods: 

pref.getString("key",default_value)
pre.setString("key", value)

Sleep the interface  

It is not recommended to use this command, because all the interface will be frozen until the established time pass.

 SystemClock.sleep(time_in_ms);
        // SystemClock.sleep(2000); // Never do this!
        // Any long-running method will slow down
        // the whole look and feel of Android and
        // make your app very unresponsive and sluggish
 

Other option is use  postDelayed method, that execute a Runnable method after a specified time

private TextView mTextView;

@Override
    public void onClick(View arg0) {
               
       
Runnable adder = new Runnable () {
            @Override
            public void run() {
               
                int clickCount = 20 + mPrefs.getInt("clicked", 0);
                mPrefs.edit().putInt("clicked", clickCount).putBoolean("user", true).commit();
               
                mTextView.setTextColor(0xff00ff00);
                mTextView.setText("Click!" + clickCount);
               
            }
        };
       
        // Run the adder code in 2000 milliseconds time
        // i.e. 2 seconds
        mTextView.
postDelayed(adder, 2000);
       
    }


Android - First Step II

Create a ScrollView

This view create a scroll in all he view. In activity_main.xml file start with the tag <ScrollView>. Inside the tag <ScrollView> must be another Layout tag

<ScrollView xmlns:android="http://schemas.android.com/apk/res/android"
    xmlns:tools="http://schemas.android.com/tools"
    android:layout_width="match_parent"
    android:layout_height="wrap_content"
    android:paddingBottom="@dimen/activity_vertical_margin"
    android:paddingLeft="@dimen/activity_horizontal_margin"
    android:paddingRight="@dimen/activity_horizontal_margin"
    android:paddingTop="@dimen/activity_vertical_margin"
    android:fillViewport="true"
    tools:context=".MainActivity" >


     <LinearLayout
         android:layout_width="match_parent"
         android:layout_height="match_parent"
         android:orientation="vertical" >


    </LinearLayout>

</ScrollView>


Event after text change in EditText

After get the EditText element, as the following code:
mComment = (EditText) findViewById(R.id.comments);

Create a TextWatcher object, that is the responsible of expose link to the event.
TextWatcher watcher = new TextWatcher() {
           
            @Override
            public void onTextChanged(CharSequence arg0, int arg1, int arg2, int arg3) {
                // TODO Auto-generated method stub
               
            }
           
            @Override
            public void beforeTextChanged(CharSequence arg0, int arg1, int arg2,
                    int arg3) {
                // TODO Auto-generated method stub
               
            }
           
            @Override
            public void afterTextChanged(Editable arg0) {
                // TODO Auto-generated method stub
               
            }
        };